I. Introduction
The press brake is a commonly used machine tool in sheet metal fabrication, which is designed for metal sheet bending and forming. It aims to offer precise bending via various metals like steel, stainless steel). The common type of press brake is mechanical press brakes, manual press brakes, hydraulic press brakes, CNC press brakes.
And this bending machine is widely used in many aspects like automotive, aerospace, architecture, and manufacturing. It is crucial to install the press brake correctly. A well-installed machine can not only ensure quality and accuracy but also can ensure the safety of operators.
However, if the press brake is not installed well, it may produce undesired bending results, cause machine damage and bring potential risks to press brake operators and machines. In our passage, we will delve into the whole process of the press brake installation. Watch the video first.
II. Press Brake Installation
Preparation Before Installation
Choose the location:Â choose a site that offers sufficient space around the press brake, which can ensure stability and safety. The site makes it easy for operators to work and is also convenient for maintenance and care. A cramped space can hinder workflow and increase the risk of accidents.
Ensure appropriate fundamentals:Â the press brake should be installed on a solid fundamental to make sure it is accurate and steady. The fundamental could be a concrete floor or a specially designed frame. The fundamental should be firm and solid enough to withstand the vibration and working load of the machine.
Level surface: the installation site must have a level surface to prevent vibrations and uneven pressure distribution during press brake operation. An uneven foundation can lead to misalignment of the press brake, resulting in inaccurate bends and increased wear on machine components.
Reinforced foundation: use reinforced concrete foundations capable of supporting the weight of the press brake and the operational forces it generates. According to industry standards, a foundation thickness of at least 12 inches with reinforced steel bars is often recommended. This prevents settling or shifting, which could otherwise compromise the machine's performance.
Verify the electricity requirement:Â usually, the press brake needs an electricity power supply to drive it's motor and controller. Before installation, ensure the power supply is appropriately accessible to fit the electricity requirement. This may be concerned with electricity manufacture cooperation to ensure the steady operation of the machine.
Electrical requirements: Verify the power supply specifications, such as voltage, phase, and frequency, to match the press brake's requirements. For instance, if the press brake requires a 480V three-phase power supply, ensure the facility can provide this without overloading existing circuits.
Dedicated circuit: Use a dedicated electrical circuit for the press brake to prevent interference with other equipment and to enhance safety. A dedicated circuit means that the press brake has its own breaker and wiring, reducing the risk of electrical faults.
Ventilation: Provide adequate ventilation to dissipate heat generated during operation. Proper airflow prevents overheating and extends the lifespan of electronic and hydraulic components. In some cases, air conditioning may be necessary to maintain optimal working temperatures, especially in facilities located in warmer climates.
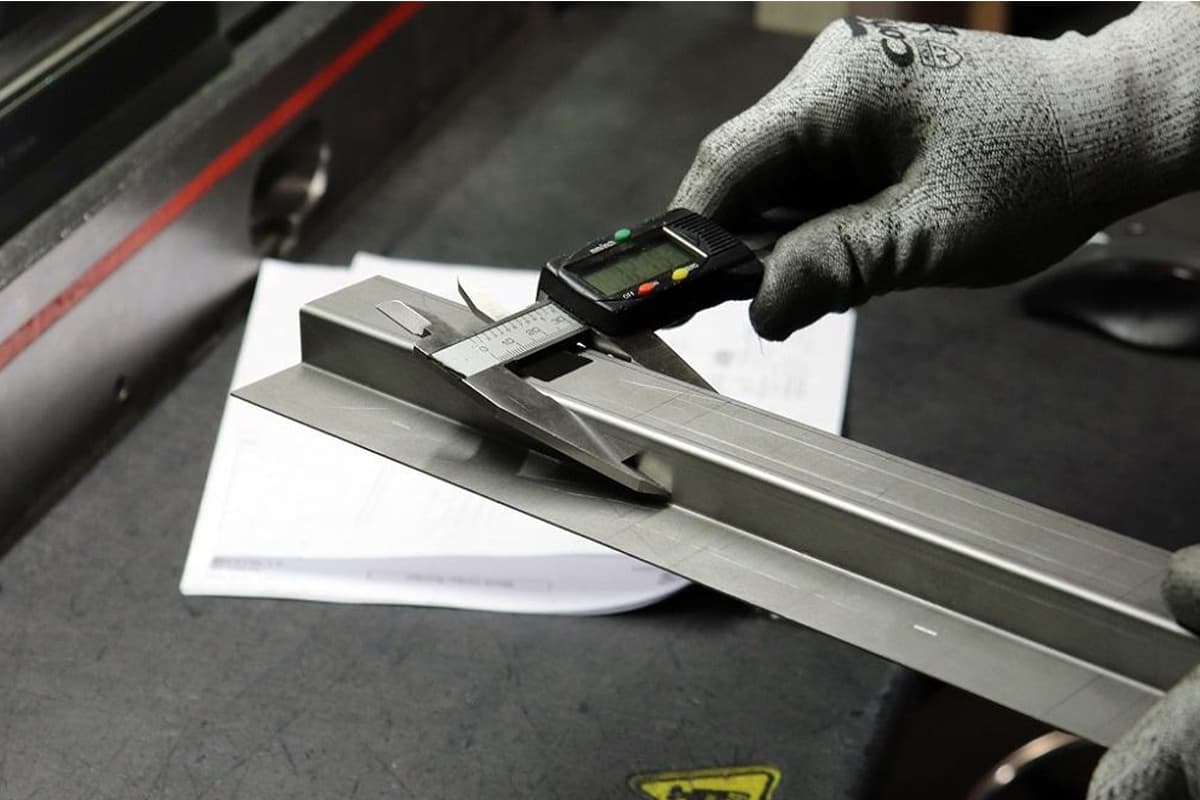
Tooling and equipment prepared: the crane or forklift is indispensable for operating and locating large-scale metal sheets and accessories. The wrench, screwdriver, and other tools can make it easy for operators to quickly and efficiently perform routine maintenance, troubleshoot minor issues, and make necessary adjustments. The precise spirit tool and rulers are also necessary for precision and accuracy checking. Equip yourself with multimeters, insulation testers, and other electrical testing tools to verify the integrity of electrical connections. Ensure that all personnel involved in the installation wear appropriate safety gear, including gloves, safety glasses, and hard hats.
Positioning
Use the forklift or crane to position the press brake to the pre-prepared fundamental. Ensure the lifting equipment is securely attached to the machine's lifting points. Position the press brake machine with enough clearance on all sides for maintenance and operation. For example, leaving a minimum of 1 meter of space around the machine allows easy access for operators and technicians.
Unpacking
Check for any visible damage or missing parts: after the press brake machine tool is unloaded safely, inspect for any dents, scratches, or other signs of physical harm. It is crucial to record any damaged or lost parts and report them to the manufacturers and suppliers.
Remove the coated surface or transportation brackets:Â before operating the press brake, remove these painted surfaces and necessary shelves. Please follow the manufacturer's guidelines, and learn how to protect the components and tooling.
Specific Steps
Step 1: install the base
According to the model and specification of the press brake, put the base in a proper position, then use the bolt or other fixed device to fix the base on the ground.
Step 2: install the columns
Mount the columns on the base. The columns are usually composed of two or more components. Install and assemble according to the operation guideline. Use the bolts or other accessories to fix the columns on the base, ensuring it is vertical and stable.
Step 3: install the beam
Install the beam on the column. The beam is made up of one or multiple beam sections. Install the beam correctly refers to the operation guideline. Use the bolts or other fixed parts to fix the beam on the column, ensuring it is horizontal and stable.
Step 4: install the workbench
Put the worktable on the base and ensure it is aligned with the base.
Step 5: install the ram
Install the ram on the workbench, and use the bolt to adjust it to the proper height and position.
Step 6: install the upper punch
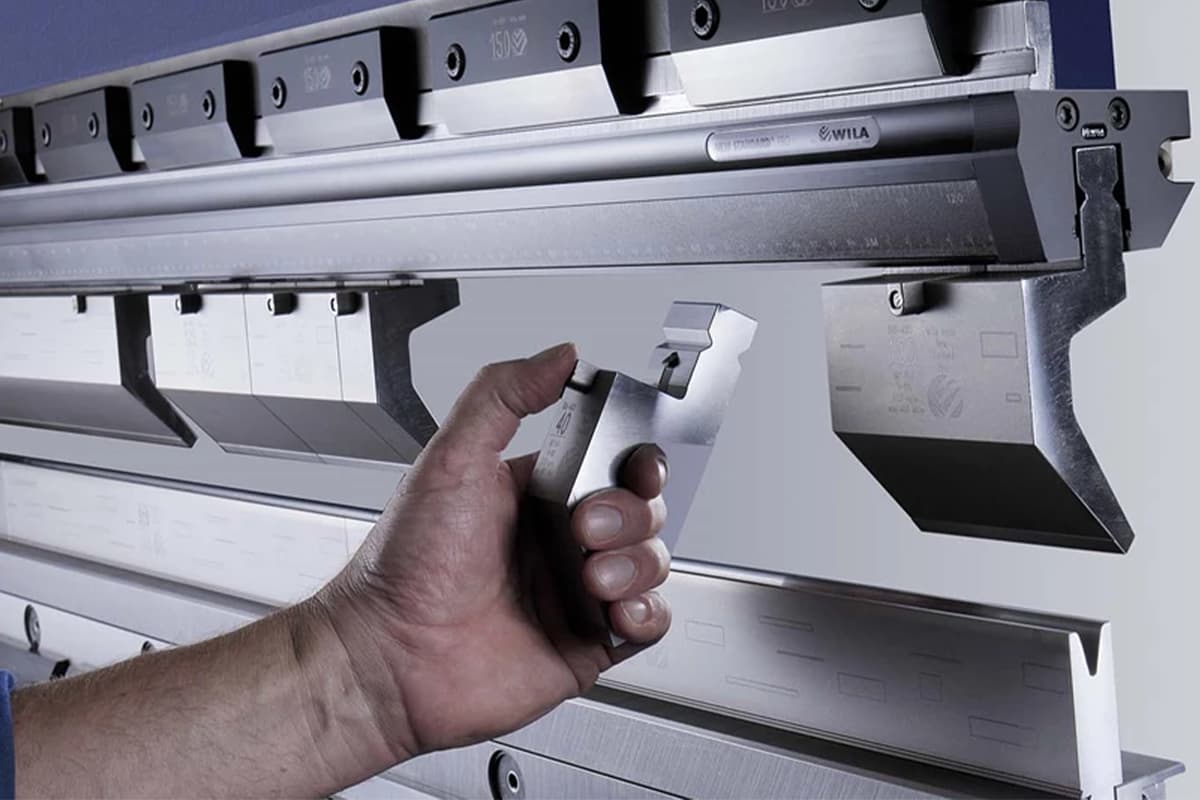
After determining the tooling position on the bed, install the upper punch on the ram, and use bolts and other parts to fix it firmly.
Step 7: install the bottom die
Install the bottom die on the workbench, and use bolts and other parts to fix it firmly.
Step 8: install the hydraulic system
Install the hydraulic pump: according to the manufacturer’s reference, mount the hydraulic pump in the proper position of the press brake. Usually, the hydraulic pump can be fixed on the machine tool through bolts. Connect the oil inlet and outlet of the hydraulic pump to ensure a firm connection.
Install the hydraulic cylinder: ensure the position of the hydraulic cylinder according to the design drawings, and use bolts to fix the cylinder on the press brake. Connect the oil inlet and outlet of the hydraulic cylinder to ensure a firm connection.
Install the hydraulic valve and controller: ensure the installation position of the hydraulic valve and controller based on the design drawing, and use bolts to fix them in the appropriate position. Connect the oil inlet and outlet of the hydraulic valve and controller to ensure a firm connection.
Install the hydraulic tank and filter: mount the hydraulic tank properly and use the bolts to fix it. Connect the hydraulic tank and filter and ensure their firm connection.
Install the hydraulic piping: based on the design drawing and manufacturer’s guide, install the hydraulic piping, and connect hydraulic components and piping. Ensure the hydraulic piping is connected firmly without leaking, and mount the piping correctly, fix the clamp.
Fill the hydraulic oil: based on the manufacturer’s regulation, choose the proper hydraulic oil, and pull the oil into the tank until meeting the requirement of the oil level. Start the hydraulic system, extract the air, and check whether the hydraulic system runs commonly or not.
Step 9: connect the electrical system
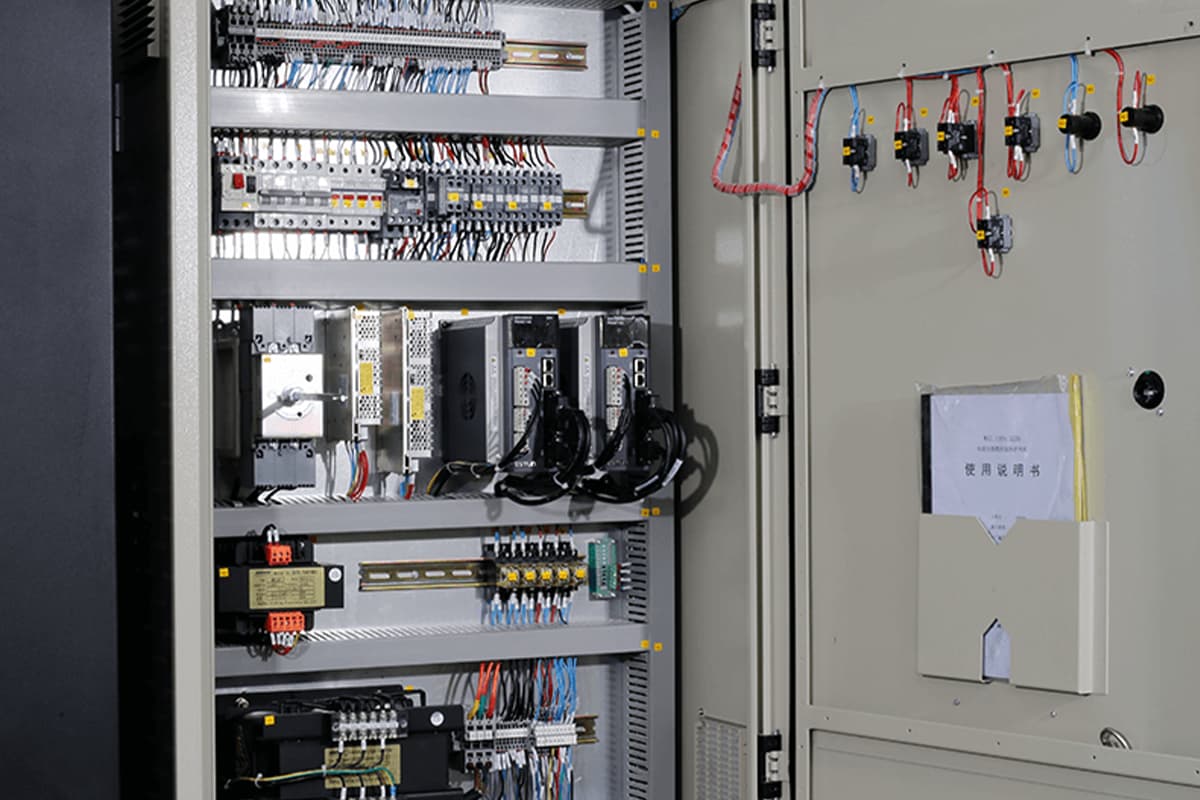
Connect the electrical system and power supply, and ensure the electricity line is firm and reliable.
Main power connection: connect the main power line to the appropriate outlet or switch. Ensure the connection is firm and use the appropriate electrical connector.
Control panel connection: connect the electrical components on the control panel to the main power supply of the machine. This includes connecting the controller, buttons, Indicator lights, and electric valves to the proper power wiring and terminal blocks.
Motor connection: connect the electric drive motor to the main power supply and controller. This usually is concerned with connecting the power and control wires to the proper terminals.
Sensor and limit switch connections: the press brake is equipped with a sensor and limit switch, which are used for testing and controlling the bending process, and can be connected to the control panel and controller.
Grounding connection: ensure a good connection between the metal part of the press brake and the grounding of the electrical system. This aims to ensure safety and protect against electric shock and static buildup.
Testing and debugging: after finishing the above process, it is necessary to check and debug. Ensure all the electrical components work in good condition and the control panel can control the press brake well.
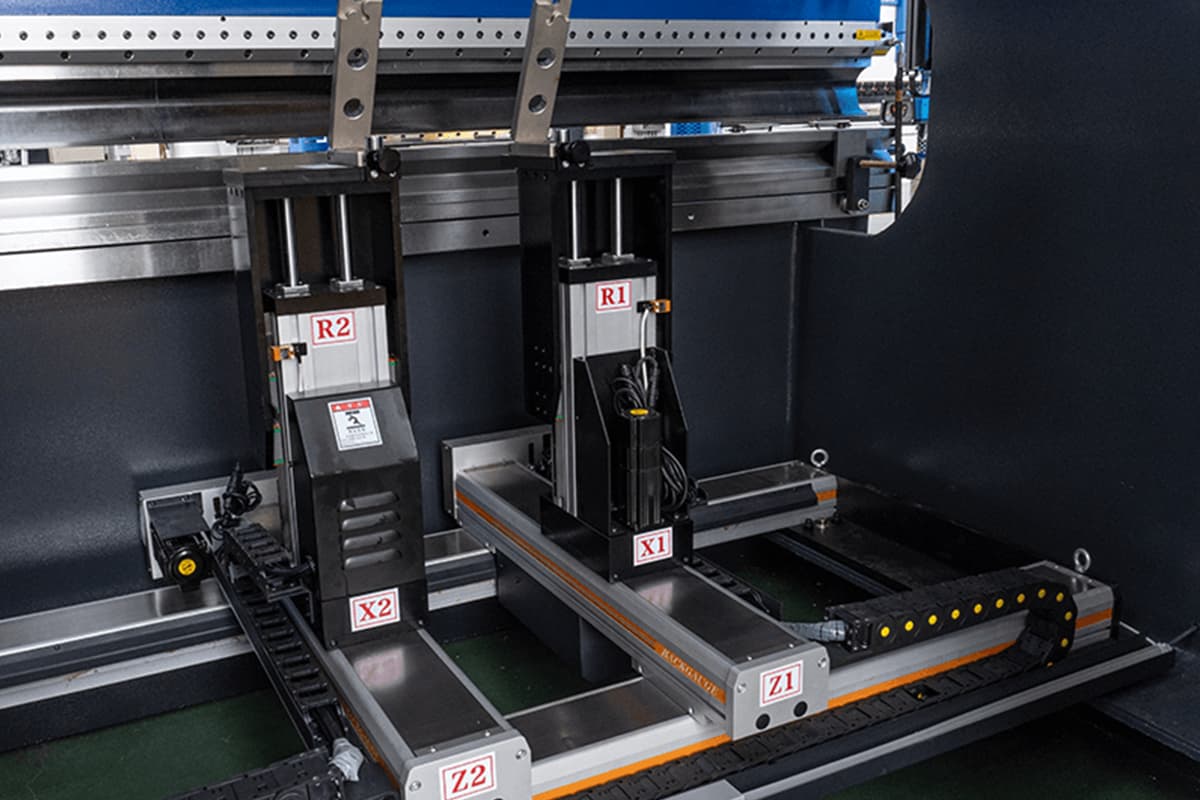
Step 10: install the back gauge system
Ensure the installation position: usually, the back gauge should be installed on the rear of the press brake to support and position the workpiece to be bent.
Install the bracket: fix the bracket of the back gauge on the worktable of the press brake. Ensure that the bracket is stable and connected with the structure of this sheet metal product.
Install the support bar: the support bar is usually installed on the rear or side of the press brake.
Install the guide rail: make sure it is aligned with the arm and support bar, and fix them firmly.
Connect the transmission: connect the transmission to the controller or moto. Ensure it can be moved and adjusted according to the anticipation. This usually involves installing electric motors, chains, gears, etc.
Install the slider: install the slider on the bracket of the back gauge, and ensure its smooth running. It may be necessary to use the adjustment screw to adjust the slider's position and height.
Install the control system: install the back gauge controller in the proper position, and connect the wire and sensor according to the explanation of the manufacturer. Ensure the control system can control the position of the back gauge’s slider accurately.
Step 11: Leveling and calibration
Precision leveling
Use laser levels or precision spirit levels to ensure the press brake is perfectly level. Check the levelness at multiple points across the machine to achieve even weight distribution. Proper leveling is essential for accurate bending and reducing mechanical stress on the machine. For instance, place a level on the bed and the ram to confirm both are aligned.
Calibration
Once the machine is leveled, calibrate the press brake's components, including the ram and back gauge system. Calibration ensures the machine operates within specified tolerances, resulting in precise and consistent bends. Follow the manufacturer's guidelines for calibration procedures and use calibration tools as needed. For example, use a dial indicator to measure the ram's movement and adjust accordingly.
Step 12: final checking and handover
The first step of the final inspection is to check the installed press brake comprehensively. This includes checking all the components and their performance. The operators need to check the hydraulic system, electric connection, control panel, and other essential ingredients to ensure their correct installation without any damage.
If any problem or difference occurs, please seek help from the manager or manufacturer immediately to avoid severe problems in the future. Also, file recording is an indispensable part of the handover process. Additionally, it is necessary to secure and organize maintenance plans and detailed information to ensure instant maintenance.
Step 13: Maintenance and troubleshooting
Maintenance
Regular maintenance: the accumulated dirt, dust, and debris.
Lubrication: especially pay attention to axes, guide rail, hydraulic components, and other vital parts.
Components checking: perform regular visual checking of the machine components and replace and repair the damaged parts.
Calibration and alignment: ensure the press brake can be calibrated and aligned correctly.
Operators training: skilled operators can prolong the life span of the machine.
Troubleshooting
Misalignment or inaccurate bends: check for any damage, and the uncalibrated problem with the bending die and punch. Replace them in time.
Hydraulic system failure: check whether the hydraulic piping, connector, and sealed components leak or damage. Replace all the worn parts and ensure the proper oil level and cleanliness.
Electric problem: check the electric connection, switch, and sensor. Look for loose and damaged wires and connections. Please refers to the guideline and skilled operators for help.
Loud noise and vibration: check whether there is a loose part, damaged bearing, or worn parts on the machine. Tighten loose parts and replace any damaged or worn parts.
III. Conclusion
The press brake is one such tool that is capable of bending even the largest sheet metal, making it an indispensable and critical piece of equipment in the sheet metal forming and shaping process.
In conclusion, properly installing new press brakes is essential to the operation of the metal sheet and mechanical engineering. It offers fundamentals for highly efficient and precise bending and ensures the expected results, as well as decreases the potential risks.
IV. FAQs
1. What tools are needed for press brake installation?
- Lifting Equipment: Forklift or crane, slings, and shackles for moving and positioning components.
- Measuring and Alignment Tools: Spirit level, laser level, and dial indicator for accurate leveling and alignment.
- Hand Tools: Socket set, torque wrench, and hex keys for assembly and securing parts.
- Electrical and Hydraulic Tools: Voltage tester, hydraulic pressure gauge, and oil dispenser for checking electrical and hydraulic systems.
- Safety Equipment: Gloves, goggles, and hard hats for personal safety.
- Calibration Tools: Protractor, feeler gauge, and shims for angle and clearance adjustments.
- Documentation and Software: Installation manuals and calibration software, if applicable.
2. How do I ensure the press brake is level during installation?
To ensure a press brake is level during installation, place it on a stable, solid foundation, like concrete, and use a spirit level to check for levelness. Adjust the leveling bolts if deviations exceed 1-2 mm per meter. Add support plates under each bolt if recommended, and ensure the machine is anchored securely. Center the press brake on its foundation to prevent movement.
Verify electrical and hydraulic connections, ensuring hydraulic oil is at the right temperature and free of bubbles. Finally, test for accuracy by checking ram parallelism, crowning, and die alignment to confirm proper leveling and precision in operation.
3. How can I optimize the installation process to reduce costs and time?
To optimize the installation process and reduce costs and time, consider the following steps:
- Set Target Times: Define target times for each phase of installation and regularly monitor performance to identify improvement areas.
- Optimize Packaging and Delivery: Arrange components in the installation order, ensuring parts are easily accessible to minimize unpacking and searching.
- Prepare the Site: Confirm essential site conditions (e.g., electricity, gas, water, foundation) with the customer before installation to avoid delays.
- Apply SMED (Single-Minute Exchange of Die): Separate internal and external press brake setup tasks, streamline steps, and reduce adjustments to save time and increase efficiency.
- Use Advanced Scheduling Tools: Tools like Order Slotting and Detailed Scheduling help manage resources efficiently, shorten lead times, and handle changes effectively.
- Implement Lean Practices: Utilize lean techniques such as value stream mapping, 5S, and Just-in-Time (JIT) production to reduce waste and improve flow.
- Automate Repetitive Tasks: Use robotic process automation (RPA) and workflow management systems to handle repetitive tasks, reducing manual work and errors.
- Develop Innovative Tools and Processes: Implement tools like automated commissioning tests or use robots for repetitive tasks like drilling to save time and costs.
- Apply Group Technology and Mixed-Model Production: Group similar processes and products to minimize changeover times and balance workloads.

Download the Infographic With High Resolution
Glass Cloth Tape,Glass Cloth Tapes,Glass Cloth Electrical Tape,Sealing Aluminum Tape
Kunshan An De Qing Electric Technology Co., Ltd. , https://www.andeqing.com